How to replace a gateway in an installation?
This article should help users of SenteraWeb to replace the gateway in an installation. This could be necessary due to gateway malfunction or system modification.
Step one: New gateway configuration
First of all, you need to configure the new gateway. Provide the power supply according to the gateway datasheet.
If your gateway supports Ethernet cable connection and you intend to use it, no extra settings are necessary. Plug in the cable and proceed to step two.
If your gateway supports Ethernet cable connection and you intend to use it, no extra settings are necessary. Plug in the cable and proceed to step two.
If you want to use Wi-Fi connection instead, you have to perform the following operations:
1. Using your computer or mobile device, scan for available Wi-Fi networks (see Fig. 1). Connect to your gateway using the default password “123456789” (without brackets).
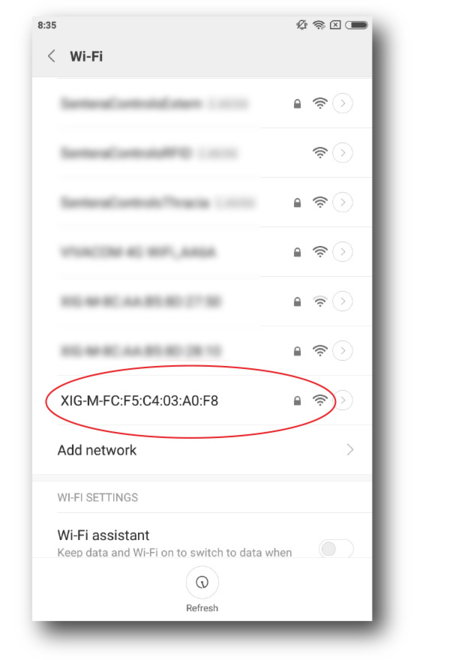
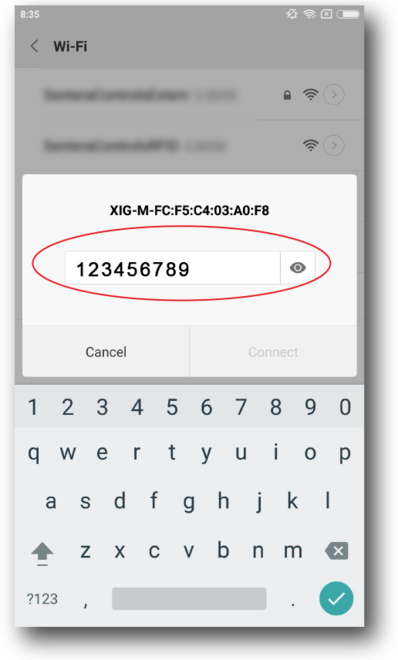
Figure 1. Connecting to the gateway
2. Open the internet browser of your mobile device or computer and go to 192.168.1.123. This should bring you to the internal host page of the Sentera Internet Gateway (See Fig. 2).
If you have two or more available gateways, please make sure that the Production UID displayed on this page matches with that of your gateway. You can check the Production UID using our 3SModbus tool.
If you have two or more available gateways, please make sure that the Production UID displayed on this page matches with that of your gateway. You can check the Production UID using our 3SModbus tool.
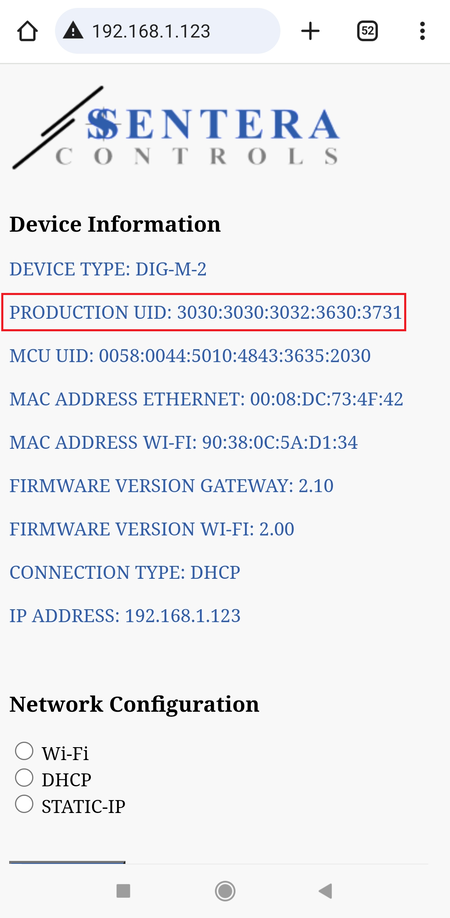
Figure 2. Gateway configuration page
3. Choose “Wi-Fi” in Network configuration
4. Select the Wi-Fi network to which you want to connect your gateway, enter the password of the selected network and click/tap “Save & Restart” button (See Fig. 3)
5. After a few moments, a green LED will light up on your gateway, indicating that is has been successfully connected to Wi-Fi.
4. Select the Wi-Fi network to which you want to connect your gateway, enter the password of the selected network and click/tap “Save & Restart” button (See Fig. 3)
5. After a few moments, a green LED will light up on your gateway, indicating that is has been successfully connected to Wi-Fi.
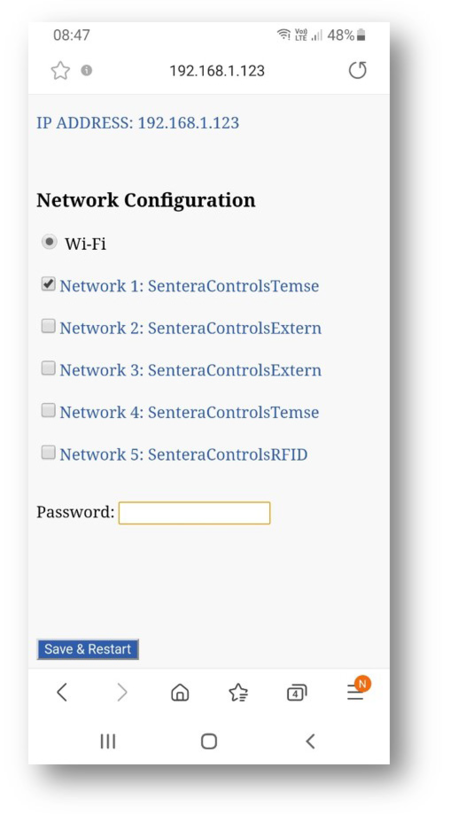
Figure 3. Choosing the Wi-Fi network
Step two: Replacing the gateway
Now we can proceed to replacing the gateway in SenteraWeb. You can perform this procedure even if the old gateway is lost, destroyed or just not supplied with power. In order to replace the gateway, follow these steps:
1. Go to https://senteraweb.eu
2. Log in, using your valid credentials (e-mail and password)
3. From the main page, select the installation where you want to replace the gateway by clicking on it
4. Click on “Installation actions”
2. Log in, using your valid credentials (e-mail and password)
3. From the main page, select the installation where you want to replace the gateway by clicking on it
4. Click on “Installation actions”
4.1. Click “Reconnect archived installation” if your installation has the status “Archived” (see Fig. 4)
OR
4.2. Click “Replace the gateway” if your installation has the status “Active” (see Fig. 5)
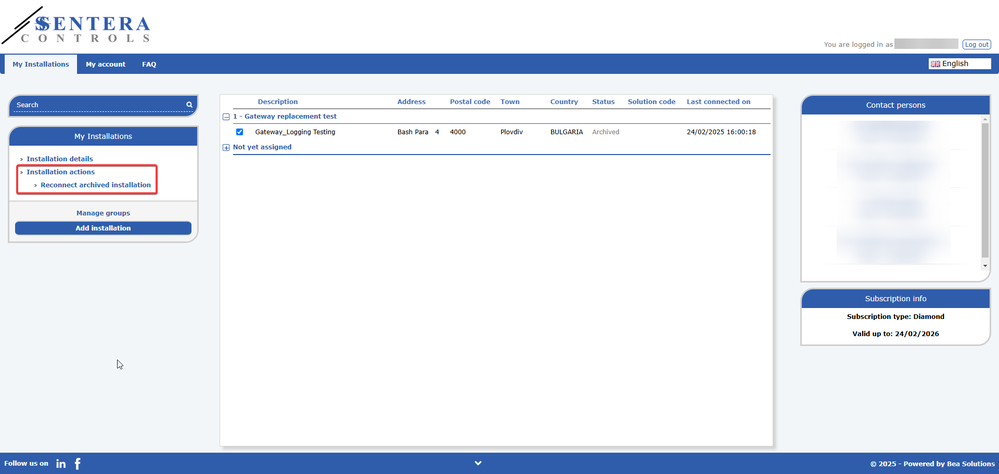
Figure 4. Replacing the gateway in archived installation

Figure 5. Replacing the gateway in active installation
5. On the opened page, enter the serial number of the new gateway, click “Validate” and then select “Yes” (see Fig. 6)

Figure 6. Validating the new gateway
6. A message confirming the successful replacement of the gateway will appear (please note that this process may take several minutes).
After completing these steps, you can seamlessly access your installation the using new gateway.
For any questions, difficulties, or troubleshooting, please refer to the datasheet and mounting instructions for the gateway available on our website.
If the problem persists, do not hesitate to contact us.